Reviving Your Kitchen Game With The Best Knife Sharpeners in 2024: Transforming Dull Blades into Kitchen Heroes
Ever felt like your trusty chef’s knife has lost its mojo? You know, that feeling when it struggles to slice through a tomato without squishing it or turns a perfectly good onion into a teary-eyed mess? Well, today we’re investigating the world of knife sharpeners – those magical tools that can breathe new life into even the dullest blades.
Did you know that the secret to a sharp knife lies in the microscopic world of blade edges? Over time, as we put our knives to work, they accumulate tiny nicks and bends that dull their cutting power. But fret not, my culinary comrades, for the art of knife sharpening is here to save the day! From whetstones to honing rods, we’ll explore the different tools of the trade and learn the tips and tricks to keep your knives slicing and dicing like a pro. Get ready to sharpen up and slice through your kitchen challenges with ease – let’s get cooking!
Table of Contents
Understanding Knife Sharpeners: The Science Behind the Edge
It’s not just about running your blade through a knife sharpener and hoping for the best – oh no, my friends, there’s a whole science behind it:
The Microscopic World of Blades
Every time you use your knife, its blade comes into contact with cutting boards, plates, and food itself. Now, on a microscopic level, this creates tiny bends and nicks along the blade’s edge, like a rocky road for your knife to navigate. Over time, these imperfections accumulate, causing your once-sharp blade to lose its edge and turn into a kitchen klutz.
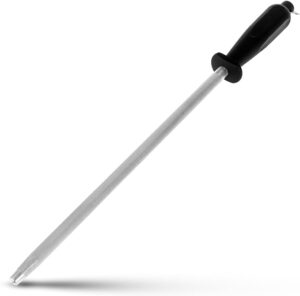
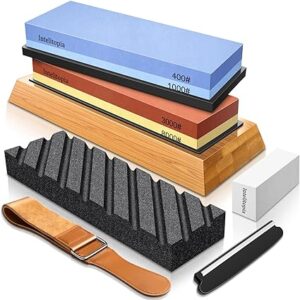
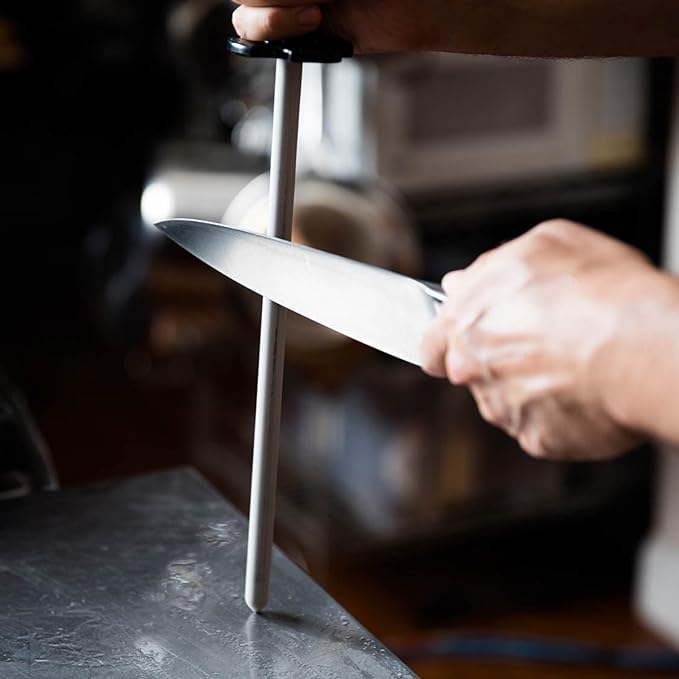
Whether you’re using a whetstone, honing rod, or electric sharpener, the goal is the same – to realign and reshape the blade’s edge, restoring it to its former glory.
So, the next time you find yourself facing off against a dull blade, don’t panic. Instead, channel your inner knife sharpener and embrace the challenge. With a bit of know-how and practice, you’ll soon be wielding a blade so sharp, it’ll make even Gordon Ramsay jealous.
Preparing Your Knife for Sharpening: A Pre-Sharpening Pep Talk
Let’s face it, even knives need some encouragement from time to time!
1. Checking for Nicks and Damage
First things first, give your knife a once-over to check for any battle scars it may have acquired along the way. Are there any big nicks or chips in the blade? If so, don’t worry, we’ll address those later. For now, just take note of any areas that may need some extra TLC.
2. Cleaning the Knife
Next up, let’s give our knife a good scrub-a-dub-dub. A clean blade is a happy blade, after all! Grab a damp cloth or sponge and gently wipe down the entire length of the blade, removing any lingering bits of food or grime. Trust me, your knife will thank you for it.
3. Securing the Knife and Workspace
Now that our knife is sparkling clean and ready to roll, it’s time to find a cozy spot to get down to business. Set up your sharpening station in a well-lit area with plenty of elbow room – we don’t want any accidental knife-related mishaps now, do we?
Our knives are prepped, our spirits are high, and we’re ready to tackle the wild world of knife sharpening with gusto. Stay tuned for the next installment of our sharpening saga, where we’ll explore the world of different kinds of knife sharpeners. Until then, happy prepping!
Using Knife Sharpeners: Sharpening Techniques
Alright, let’s sharpen our focus and delve into the art of using a knife sharpener. Whether you’re wielding a whetstone, honing rod, or electric sharpener, mastering the technique is key to bringing your blade back to life.
1. Choosing the Right Grit
First up, let’s talk grit. Think of it as the sharpener’s secret sauce – the coarser the grit, the more metal it’ll remove from your blade, while finer grits are perfect for refining and polishing. So, before you dive in, consider the condition of your knife and choose the grit that best suits your needs.
2. Wetting the Stone
If you’re using a whetstone, it’s time to get wet and wild. Submerge the stone in water for about 5 to 10 minutes until it’s fully saturated. This helps to lubricate the surface and prevent your blade from overheating as you sharpen. Trust me, a little hydration goes a long way in the sharpening game.
3. Mastering the Technique
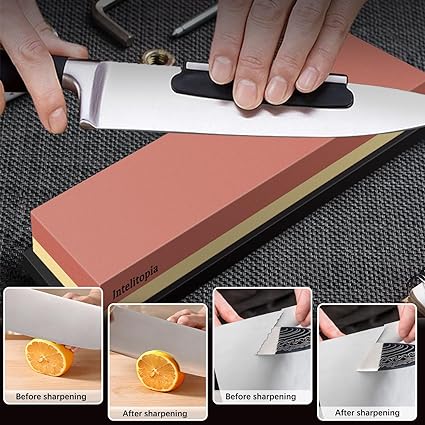
Now for the fun part – sharpening your knife like a pro. Hold the knife at a consistent angle (usually around 20 degrees) and draw it across the sharpening surface in smooth, controlled strokes. Whether you’re using a circular motion with a whetstone or a back-and-forth motion with a honing rod, the key is to maintain a steady hand and even pressure.
4. Testing Sharpness
Once you’ve sharpened to your heart’s content, it’s time to put your blade to the test. Give it a gentle touch on a piece of paper or a ripe tomato – if it slices through effortlessly like a hot knife through butter, congratulations, you’ve nailed it! If not, don’t be discouraged – practice makes perfect, and with a bit of perseverance, you’ll soon be sharpening like a seasoned pro.
So there you have it– a crash course in sharpening techniques that’ll have your knife sharper than a well-dressed chef’s wit.
Read More:
The Ultimate Guide to Choosing the Perfect Chef’s Knife: A 2024 Comprehensive Buyer’s Guide
Top 5 Professional Chef’s Knife Picks of 2024: Upgrade Your Collection
A Thorough Review of The Great 33-Piece Silicone Cooking Utensils Set

